Articles
Do I Really Need A
Putter?
The "Sweet Spot"
Proper Use Of The Golf Cart
Plumb Bobbing
Worthy Range Practice
The Dreaded Shank
Swinging Strength
Coil Into Power
Preshot Routine
If This Were My Golf Course
Lightening
The "Sweet Spot"
By Eileen Zilvetti
Today most putters that are sold
have the ‘sweet spot” indicated by a line. If you do not know where
the “sweet spot” is on your putter determine it by the following:
With your left hand suspend your
putter in front of you using your thumb and forefinger.
Tap the face of the putter with your
right index finger at different points near its center.
As you tap the putter it will move
slightly and will vibrate.
As you continue to tap in various
places you will notice a point where there is no twisting or turning
of the putter and the least amount of vibration.
It is at this point where you have found the center of
gravity which is the ‘sweet spot’.
Strive to make contact with the ball at the ‘sweet spot”.
Proper Use of the Golf Cart
By Eileen Zilvetti
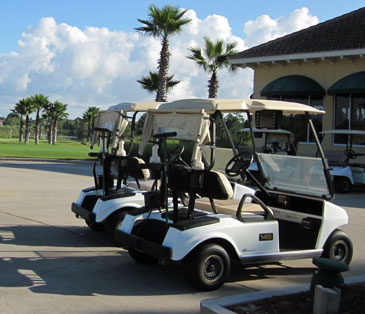 When the golfer receives the golf cart he may be told to stay on the
cart path, use the 90 degree rule or scatter.
To scatter means that once you leave the teeing area you may
continue on the course toward your ball.
When you are asked to follow the 90 degree rule that means you
may leave the cart path at 90 degrees toward your ball and after making
the stroke return back to the cart at 90 degrees.
Of course if you did not hit the ball too far you may drive to it
and then return back to the cart path.
When the golfer receives the golf cart he may be told to stay on the
cart path, use the 90 degree rule or scatter.
To scatter means that once you leave the teeing area you may
continue on the course toward your ball.
When you are asked to follow the 90 degree rule that means you
may leave the cart path at 90 degrees toward your ball and after making
the stroke return back to the cart at 90 degrees.
Of course if you did not hit the ball too far you may drive to it
and then return back to the cart path.
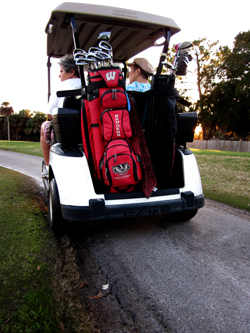
When you first receive the cart make
sure the golf bag is securely strapped, as it may otherwise fall off.
How embarrassing!
Tuck all paraphernalia well in the back basket so they don’t slip out when driving on the course or in the rough. Avoid putting your wallet, cell phone, keys, or valuables in cubby hole area.
On cold mornings use the choke to
help start the cart if there is one available.
Ride with both feet inside the cart.
If you come to an uneven area in the cart path and your leg is
hanging out you may break your ankle. Please
do not attempt to stop the cart with your feet.
Place your club back into your bag
before you return to the cart and take off. Riding the cart with a club
in your hand is very dangerous.
A quick stop, sudden jerk, or going over a bump may cause the
club to hit your face or body or even cause and eye injury.
Many carts have a brake pedal that
has two parts or sections. If you
press the lower part before you accelerate, the brake pedal will
disengage and allow you to press the accelerator pedal easier and not
experience a loud and jerky start.
Report any noticeable problems you
may see or have encountered with the golf cart to the pro shop.
Examples of problems are:
soft brakes, jerky
movements, an unfamiliar noise, low tire, flat tire, a branch stuck
underneath the golf cart, a broken windshield, the cover for clubs not
working properly, the steering wheel seems too tight, or the cart seems
to be lacking power or running out of gas.
When playing on the course keep a
lid on your beverage. This
is especially needed on sugared drinks in order to keep the bees away.
Spillage on the floor may not be noticeable by another person
that later uses that cart. Let the cart person know if you spill a drink
so that the cart may be washed.
There are many people allergic to bees.
Birds love to fly around the course.
What are they waiting or looking for?
They wait till you leave the cart and steal your snacks.
Protect your snack by keeping them securely closed and out of
their sight and reach.
 When you are asked to use the cart
path only, try to avoid going off it, even the slightest bit.
The tires may erode areas adjacent to the cart paths making the
course look bad.
When you are asked to use the cart
path only, try to avoid going off it, even the slightest bit.
The tires may erode areas adjacent to the cart paths making the
course look bad.
If your golf ball is on a mound
please do not drive the cart on the mound. The golf cart could tip over.
Golf carts have no place in a sand
trap.
Drive slowly over a bridge.
 Avoid soft areas of the course and
thick grassy areas where the cart may get stuck.
Avoid soft areas of the course and
thick grassy areas where the cart may get stuck.
Do not drive the carts behind the
green.
If a cart gets stuck in a soft area,
please ask for assistance.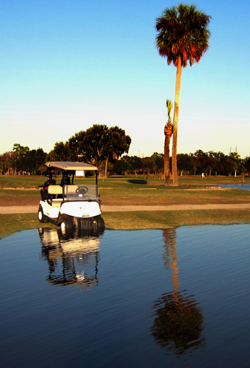
Keep the golf cart at a reasonable distance from the edge of a lake or pond.
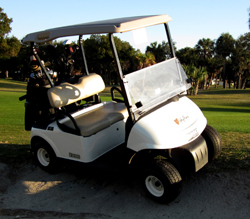
As you approach the green, when you
are about thirty feet away, go to the cart path and drive the cart to
the end of the green or past the green.
There are a number of good reasons why you would do this.
1.
You will maintain that
area in front of the green in excellent shape for golfers to make their
critical chip shots.
2.
You will be out of the
way of the group behind you approaching the green.
The group behind you will not have to wait until you put the
clubs in your bag and then move the cart. The pace of play on the course
will be enhanced.
3.
The most important
reason, to me, for taking your cart to the end of the green or past the
green is that you can get a lot of information that will help you decide
how to execute your next shot.
You are able to see the surface of the green easier, determine if
there are any swales (low lying areas or depressions on the green), see
the various levels or tilts on the putting surface (tiers), visualize
the breaks and finally see what trouble there may be behind the green.
This information that your brain gathers and assimilates as you approach
the green will aid you in choosing the correct line for your putt.
A
golf cart can do a lot of damage to a golf course.
Even a small damage can affect your shot making.
Golf is a wonderful game.
The game of golf is not easy.
Why make it more difficult? Take care of the golf course when
driving the golf cart.
Some courses do not permit the cart
on the parking lot. If the
golfer is allowed to go to his car with the cart take precaution and
drive slowly. Coming around
corners be aware of other carts and cars that may be coming along the
wrong side. As I was
returning my golf cart, another cart came around the corner on the wrong
side and hit my cart head on. I was thrown out of the cart. I landed on
my shoulder and tore my rotator cuff and injured my thumb.
My thumb was in a brace for eight weeks. A good day of golf was
spoiled.
The golf cart is not a shelter.
When there is lightning nearby seek shelter.
The golf cart is not a
shelter.
Plumb Bobbing
by Eileen Zilvetti
Some golfers like myself plumb bob most putts. I find that it confirms my original vision of the line of putt and adds information useful in my putting. When I do my pre shot routing in putting it includes plum bobbing. You must know which your dominant eye is in order to be able to plumb bob. To determine which your dominant eye do the following: Hold your thumb to an object at a distance. Look at the object with each eye separately. The eye that makes the thumb move away from the object the least amount is the dominate eye. Now you are ready to plum bob.
The steps in plumb-bobbing are as follows:
- Stand behind your ball so that the hole, the ball and your dominant eye are aligned.
- Extend your arm slightly and hold the grip of the putter lightly between your thumb and forefinger allowing it to dangle freely in front of you.
- Have the shaft of the putter intersect the ball and the hole. The ball will be at the bottom of the shaft and the hole at the top of the shaft.
- Now keep only your dominate eye open and look up at the hole to see at which side of the shaft the hole appears.
- Does the hole appear to be on the left or the right side of the shaft? If the hole is on the left of the shaft then the break is from right to left. If the hole appears on the right then the putt will break to the right. If it appears directly behind the shaft then the putt is a straight putt.
Worthy Range Practice
By Eileen Zilvetti
I have asked all my students to practice on the range. I ask them to loosen up with just a few balls before teeing off. I recommend to them that if they had a bad round or trouble with a particular shot that day to head to the range and work out the problem. Yet, when I meet with some of them again they made excuses for not going to the range.
Some of these were: I was too tired, it was too hot or too cold, I didn’t have time, the golf balls are too old, and I find it boring. Let’s take a look at some of these excuses and find solutions.
 Let's face it ladies you are not built like a man. Men have natural upper body strength that is tailor made for swinging clubs.
Coil Into Power
By Kevin Denley
Your back swing is where you begin to gather the power to explode into the ball. To achieve maximum power in your golf swing regardless of strength you need to coil.
Coiling is not the same as turning from the ball in your back swing. To coil is to wind up your body like a taut spring ready with stored power to rip through the ball.
The elements of a coiled back swing consist of your hips turned 45 degrees from the ball and your shoulders 90 degrees from the ball. If you find that you can not turn your shoulders as far as 90 degrees from the ball just make sure your hips are only turned half as much as your shoulders to keep your back swing in balance. An example would be if you can only turn your shoulders 70 degrees from the ball then your hips will be about 35 degrees from the ball.
If you are looking for more turn add a lower back rotation stretching exercise to your workout routine. Also before your first tee limber up with upper body twisting stretches. Remember to follow though on every shot so as to not waste the power you gained from coiling and watch your balls fly.